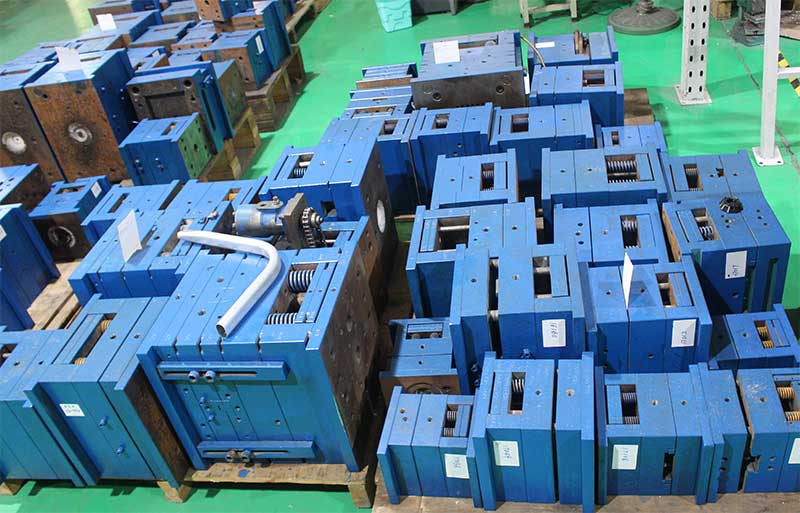
In the injection molding processing system, injection molds are not “one-and-done tools” but core assets with a well-defined life cycle. The value of a high-quality mold lies not only in its ability to produce high-precision parts but also in extending its effective service life through scientific management. From initial design and drafting to final scrapping and recycling, every stage of a mold’s life affects production efficiency, product quality, and manufacturing costs. This article breaks down the six core stages of an injection mold’s life cycle, analyzing key tasks and management points at each stage to help enterprises maximize mold value and reduce full-cycle costs.
I. The Starting Point of the Life Cycle: Design and Engineering Stage
The mold’s life cycle is predetermined at the design stage—reasonable design reduces later-stage wear and lays the foundation for long-term stable use. The core task at this stage is to “balance functional requirements with durability,” with key tasks including:
1. Material Selection: Matching Usage Scenarios
Mold material directly determines its wear resistance, temperature resistance, and corrosion resistance, requiring precise selection based on production scale and plastic type:
- Low-volume trial production (≤100,000 shots): Aluminum alloys (e.g., 6061) are chosen for their low processing costs and short cycle times, though they have relatively low hardness (about 100-120 HB) and are suitable for non-reinforced plastics (e.g., PP, ABS).
- Medium-volume production (100,000–1,000,000 shots): Pre-hardened steels (e.g., 718H, P20) with moderate hardness (30-45 HRC) are selected for their balance of processability and wear resistance, suitable for general-purpose plastics in the home appliance and electronics industries.
- High-volume production (≥1,000,000 shots): Quenched and tempered steels (e.g., H13, S136) with high hardness (50-55 HRC) are used for their excellent wear and corrosion resistance, ideal for reinforced plastics (e.g., PA66 + glass fiber) or corrosive plastics (e.g., PVC) in automotive and medical applications.
2. Structural Optimization: Reducing Stress Concentration
Design should avoid “weak links” to prevent cracking caused by stress concentration during later use:
- Cavity and core: Avoid sharp corners by setting inner radii to ≥0.5 mm to reduce impact wear during plastic filling. For deep-cavity parts (depth/diameter > 5), design reinforcing ribs to prevent core bending.
- Gating system: Use a conical sprue (taper 1°–3°) to reduce melt flow resistance. Adjust runner diameters based on plastic flowability (e.g., φ8-10 mm for PC, φ5-7 mm for PP) to avoid excessive local pressure.
- Ejection and guiding: Distribute ejector pins evenly (spacing ≤100 mm) to avoid single-point stress. Maintain a clearance of ≤0.005 mm between guide pins and bushings to prevent mold misalignment and cavity collision during clamping.
3. DFM Review: Proactively Avoiding Risks
A “Design for Manufacturability (DFM)” review identifies design flaws, such as checking if cooling channels are close to the cavity (distance 8-12 mm) to avoid uneven cooling or confirming exhaust slot placement (at the last fill location) to prevent air bubbles and pressure spikes—details that reduce mold trials and avoid later rework.
II. Molding and Manufacturing Stage
Mold manufacturing translates design blueprints into physical entities, with processing accuracy directly affecting mold lifespan and part quality. Core tasks include:
1. Precision Machining: Controlling Micron-Level Tolerances
- Cavity machining: After CNC milling for rough machining, use electrical discharge machining (EDM) for finishing to ensure dimensional tolerances ≤ ±0.005 mm. For transparent molds (e.g., PC lenses), nanoscale polishing achieves a surface roughness Ra ≤ 0.01 μm to reduce plastic adhesion and wear.
- Heat treatment: Quenched steels undergo “quenching + tempering” stages. For example, H13 steel is heated to 1020°C for quenching, followed by three tempering cycles at 550°C to ensure uniform hardness (avoiding soft spots that cause rapid wear).
- Assembly accuracy: After assembling guide pins, ejector pins, etc., use a coordinate measuring machine (CMM) to verify coaxiality ≤ 0.003 mm to prevent motion jamming.
2. Mold Trial Verification: Optimizing Details
The first mold trial (T1) validates part quality and mold performance:
- Observe uniform cavity filling; if local short shots occur, enlarge gates or optimize runners.
- Check for flash; if present, adjust parting surface fit to prevent long-term leakage and cavity corrosion.
- Test ejection smoothness; if parts stick, polish the cavity or increase draft angles (typically 1°–3°).
III. Mass Production Stage
The mass production stage is the longest in a mold’s life cycle (accounting for over 70%), where improper operation accelerates wear, while scientific management extends effective lifespan:
1. Standardized Startup Procedures
- Preheating and lubrication: Preheat the mold to the set temperature (e.g., 50–60°C for ABS) before startup to avoid cracking from sudden thermal stress. Apply high-temperature grease (temperature resistance ≥200°C) to moving parts like guide pins and ejector pins to reduce metal friction.
- Parameter matching: Set injection parameters based on mold material. For example, reduce clamping force by 10%–15% for aluminum molds to avoid overload deformation. For reinforced plastics (e.g., PA66 + glass fiber), lower injection speed (≤50 mm/s) to reduce cavity erosion.
2. Real-Time Monitoring and Maintenance
- 2-hour inspections: Use an infrared thermometer to check mold surface temperature; deviations > ±3°C require cooling channel inspection. Monitor part dimensions for deviations, which may indicate cavity wear requiring prompt polishing.
- Daily cleaning: After production, use a copper brush to remove residual plastic from runners and wipe parting surfaces with anhydrous ethanol to prevent degradation material from corroding the mold (especially for heat-sensitive plastics like PVC).
IV. Maintenance and Repair Stage
Molds inevitably wear during use; timely maintenance and repair prevent minor issues from escalating into major failures, including:
1. Routine Maintenance (Before and After Each Production Run)
- Replacement of wear parts: Replace seals (for cooling and oil channels) every 3,000 shots to prevent leaks and rust. Replace ejector pins if wear exceeds 0.02 mm to avoid scratching parts during ejection.
- Exhaust slot cleaning: Use a fine steel wire (diameter 0.1 mm) to clean exhaust slot carbon deposits every 5,000 shots to ensure smooth exhaust (blockages cause pressure spikes and accelerate cavity cracking).
2. Periodic Overhaul (Every 30,000–50,000 shots)
- Cavity repair: Use a surface roughness tester to check the cavity; if Ra increases from 0.02 μm to 0.1 μm, repolish with 0.5 μm diamond paste. For minor chipping (≤0.1 mm), repair with argon arc welding and finish.
- Structural inspection: Disassemble the mold to check guide pin and bushing wear; replace if clearance exceeds 0.01 mm. Test spring elasticity; replace all if pressing yields weak rebound (to avoid incomplete reset and mold clashing).
3. Emergency Fault Handling
- Cavity cracking: If cracks are ≤5 mm long, drill stop-drill holes and weld; for longer cracks, replace cavity inserts (saving 60% cost vs. full mold replacement).
- Ejector pin seizure: Immediately stop the machine, disassemble the mold, clean plastic from the seized area, and check for bent ejector pins to avoid forced ejection causing mold scrap.
V. Idle Storage Stage
Improper storage during mold downtime leads to rust, deformation, etc. Key tasks include:
1. Thorough Cleaning and Rust Prevention
Disassemble the mold, clean all components with an ultrasonic cleaner (neutral detergent), dry them, and spray anti-rust oil on metal surfaces like cavities and guide pins. Wrap with anti-rust paper.
2. Environmental Control
Store in a dry (relative humidity ≤60%), room-temperature (15–25°C) warehouse away from direct sunlight (to prevent anti-rust oil evaporation). Elevate molds on wooden frames to avoid ground moisture.
3. Regular Inspections
Inspect packaging every month; reapply anti-rust oil if dry. If rust occurs, sand with fine sandpaper and reapply oil.
VI. Retirement and Recycling Stage
When repair costs exceed 50% of a new mold’s cost or cavity wear is irreparable (e.g., depth > 0.5 mm), the mold must be retired:
1. Disassembly and Sorting
Disassemble the mold into components like mold frames, cavity inserts, and guide pins. Mold frames (S55C steel) can be reprocessed into smaller molds or machine tool parts.
2. Material Recycling
Scrap mold steel can be sent to steel mills for remelting, while aluminum can be recycled for simple fixtures, achieving resource recycling (reducing carbon emissions by ~30%).
3. Archive Retention
Record full life cycle data (design drawings, production shots, repair records) to inform new mold design (e.g., if a mold for a certain part averages 100,000 shots, optimize material selection for new molds).
Conclusion
The life cycle management of injection molds is a systematic project spanning “design, manufacturing, use, and maintenance.” Design sets the foundation, manufacturing ensures precision, usage requires standardized operation, maintenance repairs wear, and retirement enables recycling. For enterprises, a robust life cycle management system can extend mold lifespan by 20%–30% and reduce unit product costs (e.g., from 0.5 to 0.4 yuan/piece) while improving production stability.
In the future, with the development of smart mold technologies (e.g., embedded sensors for real-time wear monitoring), mold life cycle management will become more precise and efficient, though the core logic remains unchanged: treat molds as “long-term value-adding assets,” not “disposable consumables,” to sustain value creation in injection molding production.